Presenting The Faux Gourmet!

The Faux Gourmet has been on hiatus for a while. I began this blog as a creative outlet during law school. After law school, I started other blogs on other topics and no longer needed this as a creative outlet, not to mention my diminishing free time.

But I kept cooking, kept taking food pictures and garden pictures, kept wanting to share the little tidbits of what I'd made. I occasionally did this on my personal blog (to which, I'm sure, people yawned and wondered when I'd post another cat picture). But I started to miss this space. Of all the blogs I have, this format, culled over several dedicated years and incorporating that adorable illustration by Sam Wedelich (see info the left) is by far my favorite.

So I'm back!

Expect short and sweet posts. Less food porn, more recipes and tips. If you want food porn you can look at any of the 5000 million existing food blogs. I don't have good lighting in my apartment and don't have time to style plates. I just want to make something yummy and eat it. If that sounds ok with you, stick around.

Looking forward to being back in touch!

xx

The Faux Gourmet

Faux Gourmet @ Twitter

    follow me on Twitter
    Showing posts with label vegetarian. Show all posts
    Showing posts with label vegetarian. Show all posts

    Tuesday, May 29, 2012

    What to Do with Herbs vol 3

    Thai-ish Fried Rice

    Taste & See: It's inevitable: at some point in the summer, you will have too much caprese. 

    Sure, it's well and good in June, when can't get enough of the season's first tomatoes and basil drizzled in olive oil and balsamic. But at some point you begin to dream of other uses for basil. Maybe you make pesto. Maybe you throw some on pasta. But do you really still that tiny nagging voice in the back of your head wondering, "Isn't there something more?"

    In fact, there is.

    You may associate fried rice with cheap Chinese food, thawed frozen peas and carrots. You have been mislead.

    Thai-style fried rice is nothing like Chinese-style fried rice. It usually incorporates a colorful array of vegetables, and is often served with some combination of fresh cucumbers, tomato, and spring onions, doused with fresh lime juice, and given a shake or two of zingy white pepper.

    Like most dishes on this site, you're meant to use up what you have on hand. I prefer a simple mix of tomato and dark greens, but almost any chopped vegetables will do. (Caveat:
    Denser vegetables like carrots need more time to cook, so add them first, or even do a brief pre-stir-fry, so nothing gets burnt while you wait for the carrots to soften.)

    It's also perfect for incorporating handfuls of mixed basil. (If you grow different kinds of basil, you often have small amounts of each plant begging to be used, but not enough to season an entire dish with one variety. This is a great dish for mixing. Thai basil, spicier than the kind used in Italian food, is particularly good. Go figure.)

    I love this dish because it is cheap, quick to make, uses up leftovers, delivers a 1-dish balanced meal, and tastes great -- truly faux gourmet.

    What You Need:

    Wok 
    Oil
    Garlic
    About 1 cup day-old rice (At least! The harder and dryer it is, the less it will stick and the less oil you need.)
    Vegetables of your choosing (I used about 1 cup torn spinach leaves and 1/2 cup cherry tomatoes)
    Handful of basil leaves
    1 egg
    Seasonings to taste: soy sauce, rice vinegar, chili sauce (You could use fish sauce instead of / in addition to soy sauce. I used brine from pickled carrots / daikon instead of vinegar - you can see the pickles on the side in the photo above.)
    Garnishes to taste: lime juice, white pepper

    What to do:
    Heat oil in wok, turning wok to coat sides. Add garlic slices and fry briefly; do not let burn. Add rice and stir to coat with oil, breaking up any clumps. A wide, flat utensil works best, so you can lift and turn the rice, rather than stirring it as you would with a spoon or spatula.

    Add seasonings to taste; not too heavy - you can always taste & add more. Add vegetables in order of most to least dense. In my case, I start with a handful of cherry tomatoes, then incorporate the spinach. Move everything to one side of the wok, add a tiny bit more oil, and crack in egg. Scramble it in the pan, incorporating into rice and vegetables as it cooks. Add basil and stir to incorporate, gently cooking.

    Serve with fresh lime juice and white pepper. A garnish of cucumber and chopped spring onions is nice as well.


    Friday, August 27, 2010

    The Bounty of My Garden

    From seed to plant: pure magic
    Taste & See:  This is the bounty of my garden!


    Some of it anyway. I have officially planted kale from seed and grown enough for Hana & me to eat a meal's worth. Well, a meal if you add the pesto I made from my Italian basil plants, fat with drooping leaves; the roasted CSA tomatoes with garden rosemary and fistfuls of holy basil from plants so full it doesn't look like I've trimmed a thing; slices of baguette and glasses of Alexandria Nicole's Shepherds' Mark.


    I don't know why my basil is so beautiful when my thyme and oregano, sharing a pot, dried out completely. And I'm tempted to be frustrated that of all those seeds I so carefully patted into trim rows of earth around Easter, only the kale took root, and even that has only grown enough to fill this small bowl.


    But I'm delighted. I grew something from seed! This kale used to be a little brown ball in my hand, barely big enough to see. Now I'm eating it for dinner.


    Isn't that a miracle?

    ***

    Note - this is a repost of a post on a new project where I post a little of this and that, whatever inspires me. Which is a spin-off of a less new project where I post stories about interacting with and observing people in the city. You're welcome to take a peek at & amuse yourself with both. In fact, I hope you amuse your heart out.


    I hope to post consistently here again soon, but in the mean time, thanks for being patient as I come and go in between other work. 

    Monday, March 29, 2010

    Springy Little Ode

    May I recommend this springy little ode to ramps, one of the first crops / harbingers of spring? It is lovely, I assure you. I finished with an urgent desire to run down to the farmers' market when ramps appear (next week, I think) & buy them, as this author says, by the garbage bag load.

    (From Gourmet: gone but not forgotten).

    Thursday, February 25, 2010

    Browned Butter Braised Cauliflower

    Trust me. Browned butter even makes cauliflower tasty.

    Taste & See: I know, I know.  I had you right up until I said "Cauliflower."  Browned butter, yum.  Braised, good plan. But cauliflower? Really? That's like...bland. And mushy (or else too crunchy). And has that weird floret texture thing going on.  Really? Cauliflower?

    Yes. Trust me.  Cauliflower takes on a whole different feel under direct heat, whether "braised," as here, or roasted.  It gets soft & chewy, while still retaining some texture, and as the heat burns the tips of the florets, the natural sweetness shines through.  And oh yeah, the browned butter doesn't hurt either.  

    I like this dish because it is cheap--one head is about $2 and makes a side dish for 4.  It helps me get in some seasonal veggies even in the sparseness of winter.  And this dish requires very little prep: the head is thrown in whole and gets soft & tender deep inside as it is brushed with layers of brown butter as it cooks.  And you know, cauliflower may be a vanilla veggie, but dressed up like this it actually looks pretty darn good.

    Do it Yourself:
    Ingredients
    • One head cauliflower
    • 6 Tablespoons butter
    • Salt & Pepper
    Instructions
    • Preheat oven to 375 degrees.
    • Brown butter, preferably in a light-colored saute pan; allow to melt and swish back & forth until butter takes on nutty aroma and deep caramel color.  Remove from heat & pour into bowl.
    • Set cauliflower head in shallow pan and brush with one layer of butter.  Cover with foil and place in oven for about 45 minutes.
    • Every 15 minutes pull out and brush with another layer of butter.
    • After 45 minutes, remove foil and place in oven until tips brown, about 10 minutes more.  Brush with any last butter, salt & pepper. 

    Sunday, January 17, 2010

    Brussels Sprout Bliss

    Momofuku's Momofuku vs.
    The Faux Gourmet's Momofuku

    Image originally from Gourmet Magazine; available at Epicurious.com

    Taste & See: Um, wow. I had a culinary experience tonight that blew my mind. It involved Momofuku, the NYC restaurant group with a cult-like following for the things it does with pork belly, ramen (featured in list of NYC's 50 tastiest soups!, and cereal flavored milk. Momofuku serves swoon-worthy roasted rice cakes with a thick red spicy sauce, modeled after the Korean dish dok boki. I had it over three years ago for the first time and the memory has filled me with bliss ever since. I love authentic Korean dok bokgi with a deep passion but Momofuku's version, crispy on the outside & gooey within, is another planet.


    Image from Momofuku.com

    I ate at Momofuku (noodle bar) the other day & naturally, ordered their roasted rice cakes, among other things. Swoon. And double swoon: I planned to enjoy the leftovers at home with caramelized brussels sprouts. You see, at that same meal three and a half years ago, I ate brussels sprouts at Momofuku for the first time. I totally lose foodie cred by admitting I only had brussels sprouts for the first time 3 years ago. But stay with me. Those brussels sprouts changed my life. I'm a Brussles Sprouts Girl now, and I owe it all to (Momofuku chef) David Chang.

    I thought it only fitting I attempt to recreate Chang's recipe for my at home version. Gourmet magazine (RIP) published a version of Momofuku's brussels sprouts a few issues back. I dug it up on Epicurious & went to work, making a few adaptations along the way. Even knowing a recipe comes from David Chang isn't enough to make a recipe purist out of me.

    My meal of (left-over) roasted rice cakes, reheated in a toaster oven & freshly caramelized brussels sprouts was stellar. Blow my mind stellar. But the big surprise was that even though Momofuku's contribution tasted just as good as it did that day at the restaurant, it was my homemade play off Momofuku that really bowled me over. Warning, folks: these brussels sprouts are addictive. Like, crack brussels sprouts. Oh wait, Momofuku already took that name...

    All this to say: here's an intensely pleasurable way to eat your veggies. Dig in!

    Do It Yourself: Momofuku's (Sort of) Brussels Sprouts--Caramelized Brussels Sprouts

    Ingredients

    Roughly 2 cups brussels sprouts, trimmed & halved lengthwise
    2 Tbsp canola oil
    1 Tbsp *fresh butter
    4 Tbsp fish sauce
    4 Tbsp water
    4 Tbsp white sugar
    2 cloves garlic, minced
    3 Tbsp mint, finely chopped
    3 crushed, stemless dry red (Thai) chilies (approx 1 1/2 inches in length)

    Instructions

    Preheat oven to 450°F with rack in upper third. Cover a baking pan with a piece of foil

    Toss Brussels sprouts with oil & arrange cut sides down on the foil. Roast in oven approximately 40-45 minutes, until outer leaves are tender and very dark brown. If your brussels sprouts are on the small end, check at 30 minutes. Don't stir or turn.
    Meanwhile make the dressing by stirring together water, sugar, fish sauce til sugar dissolves, then adding garlic, mint & chilies.

    Remove pan from oven, lift foil and slide brussels sprouts into a bowl. Add butter and toss to coat. Finish by tossing with just enough dressing to coat.
    *I used maple butter from my local farmers' market. The fresh taste of the butter and the tinge of sweetness add a lovely richness. Even if you can't get 'maple butter,' it is worth the hunt & the splurge to find the highest quality butter possible. You won't believe the difference in taste--and it requires much less butter to get the same luscious flavor.

    Wednesday, October 7, 2009

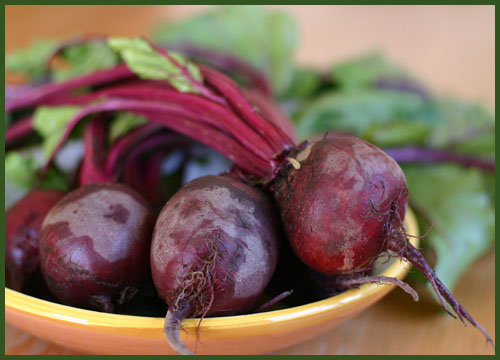
    We Got the Beet!

    I'm still without a good digital camera...it is getting rather frustrating to be unable to photograph anything I cook & has dulled my appetite for writing. I'm trying...and I really need to stop prefacing my blog posts with this. But the good photo below is way better than my photo below. Sigh...

    Tossing in a magic ingredient
    makes winter veggies pretty in pink

    Photo from Pinch My Salt Food Blog

    Taste & See: You don't have to be Sherlock Holmes to beat the riddle- between the limited number of pink plants out there and the title of this post, most of you are probably on to the magical powers of the beet. Beat away your preconceptions regarding this underappreciated little globule, often relegated to canned purple gelatinous Thanksgiving side-dishes. A beet can be so much more!

    Bet you didn't know sugar beets are used in making table sugar, did you? Or that beets were grown in ancient Babylon & ancient China? Who's late to the game now? Thousands of years of agriculture can't be wrong! Of course beets did lose their popularity with the advent of spinach. Whatever happened to make new friends but keep thee old? I say, time to bring that beet back. Even if the President isn't a fan.

    If you're anything like me (lazy & vain), you're beaten down things like beets because you don't relish (pun intended!) the idea of purple fingers. I had a whole sack of CSA beets I was avoiding for just that reason until my cousin Linda came to visit with her simple solution: cook unpeeled. Doh. Why didn't I think of that? Beaten by the beets no longer!

    Following her advice I slit off the tops and bottoms, stabbed with a fork a few times, and loaded them into my go-to roasting pan. But it looked so sad and lonely with only purple orbs. Fall wants more color--orange carrots, golden onions, brown and red potatoes...all those hardy creatures of the underground just waiting to be jazzed up with a stunner like beets. I didn't bother to peel the carrots or potatoes so the prep took mere minutes. Everything went in the roasting pan, along with a healthy toss of salt, pepper & herbs, and about 30 minutes later I had a pink roasted cornucopia.


    While you can't necessarily see it in the photo above...the dish was so pretty! Even before peeling the beets, which was a snap after they'd softened (but still gave me purple fingeritis) their color had bled to the rest of the dish in a most lovely way, giving a shockingly magenta sheen to the usually earthy roots & tubers. I served it with rice, which also became speckled with pink. Even better, the tangy flavor from the beets was set off ever so perfectly by the buttery, salty base flavor of the rest of the dish. And you can't beat a dish that comes together so quickly, with so little effort.

    If you've been avoiding beets, don't beat yourself up. Beat the habit with a beet rehab program, starting with of pink roasted cornucopia of your own.

    Do It Yourself: Pretty in Pink Roast Beets

    Ingredients
    There is no set amount of each vegetable; use what you have on hand or what you like to fill a roasting pan. Suggested vegetables: potatoes, sweet potatoes, parsnips, celery, carrots, onions, yams, garlic, and of course beets.

    For a four person serving, I used approximately 2 onions, 2 potatoes, 3 carrots, 2 medium stalks celery, & 6 small beets & and 4 cloves of garlic.

    Seasoning suggestions: I used ground pepper, garlic salt, olive oil, and chopped sage, parsley and carrot greens. Rosemary would also add a nice woodsy flavor.

    Instructions
    Pre-heat oven to 350 F.
    Do not chop beets, but cut off tops and bottoms and stab with a fork.
    Chop vegetables roughly into bite-sized pieces. Save onions, vegetables can be roasted with skins on if well-washed.
    Season to taste.
    Cover with foil and cook for approximately 30 mintues. Test vegetables; if soft, remove. If not, continue checking in 10 minute intervals.
    Peel beets when cool and chop into bite-sized pieces.

    Serve with rice or hearty bread and apple cider.

    See also: Check out some of these other beet recipes...it is enough to make you actually start craving beets!

    Cafe Fernando: Beet soup looks simply divine.
    Simply Recipe: Pickled beets, to feed your craving all winter long.
    The Kitchen Table: Beet risotto with greens
    White on Rice: Beet ice cream. NOW you're talking...
    Pinch My Salt: Chocolate Beet Muffins. I'm not making this up...

    And for the inquiring minds among us:

    Tournament of the Tubers: Not surprisingly, beets lose to sweet potatoes.
    All about Beets: The author of this easily surpasses my beet-related passion.